
As an Amazon Associate, I earn from qualifying purchases.
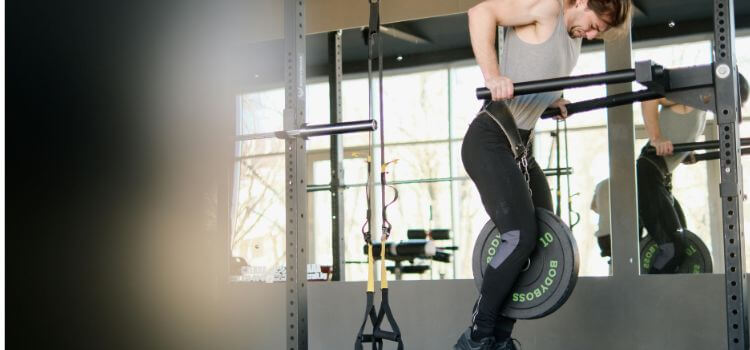
Dip bars, also known as collateral bars, and are versatile pieces of fitness ingredients that offer a range of training to objective different muscle groups. From tricep dips to leg raises, and these bars provide a full-body workout that can be efficient for different fitness levels. Whether you’re a beginner looking forward to building strength or a seasoned athlete seeking to conjoin predominance to your routine, dip bars are a lovely addition to any home gym setup.
Features of a Dip Bar
When considering how to make a dip bar, it’s essential to prioritize certain features to ensure functionality and safety.
Adjustable Height
Opt for a design that allows you to synthesize the height of the bars to accommodate individual exercises and also user heights.
Sturdy Construction
Use durable materials such as steel or aluminum to ensure the stability and longevity of the dip bar.
Comfortable Grips
Incorporate padded grips or textured surfaces to prevent slippage and minimize hand fatigue during workouts.
Space-Saving Design
Design the dip bar with a compact footprint to fit easily into home gym spaces without sacrificing stability.
Versatility in Exercises
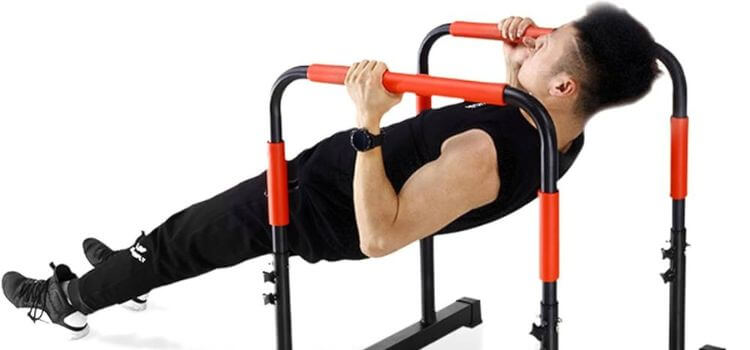
Aim for a design that enables a wide range of exercises beyond traditional dips, such as leg raises, push-ups, and L-sits.
Step-by-Step Guide to Making a Dip Bar

Now, let’s walk through the process of creating your dip bar with simple steps that anyone can follow.
Gathering Materials
Start by collecting the necessary materials, including metal pipes or bars, connectors, foam padding, and tools such as a saw, drill, and wrench.
Cutting and Measuring
Measure and cut the metal pipes to the desired length for the uprights and horizontal bars, ensuring symmetry and stability in the final structure.
Assembly Process
Use connectors to join the metal pipes together, forming the frame of the dip bar. Double-check the alignment and also secure all cohesion tightly to restrain wobbling or impermanence.
Adding Finishing Touches
Wrap foam padding around the horizontal bars to create comfortable grips for your hands. Ensure that the padding is securely attached to prevent shifting during use.
Safety Considerations
Before using your homemade dip bar, it’s crucial to consider safety factors to prevent injuries and accidents.
Weight Capacity
Determine the maximum weight capacity of your dip bar and avoid exceeding this limit to prevent structural damage or collapse.
Stability
Place the dip bar on a level surface and test its stability before each use. Make any required coordination to confirm the secure and steady base.
Maintenance
Regularly inspect the dip bar for signs of wear and tear, such as loose bolts or damaged padding, and address any issues promptly to maintain safety and performance.
Tips for Using Dip Bars Effectively
To maximize the amenities of your homemade dip bar and minimize the risk of injury, and also keep the following tips in mind:
Proper Form
Maintain proper posture and technique during exercises to target the intended muscle groups effectively and reduce strain on joints.
Gradual Progression
Start with facile alternative exercises and gradually increase intensity and difficulty as your strength and also proficiency improve.
Incorporating Variations
Experiment with different grips, angles, and movements to target specific muscles and prevent plateaus in your workout routine.
Benefits of Homemade Dip Bars

Aside from the satisfaction of creating your fitness equipment, homemade dip bars offer several advantages:
Cost-Effectiveness
Building your dip bar is often more affordable than purchasing a pre-made one, so especially if you already have a few of the ingredients on hand.
Customization Options
Customize the design and features of your dip bar to suit your preferences and fitness goals, ensuring a personalized workout experience.
Sense of Accomplishment
Building your dip bar provides a sense of achievement and empowerment, knowing that you’ve created a functional piece of equipment with your own hands.
Can I use different materials to make a dip bar?
Yes, you can customize the materials based on availability and personal preference. Just ensure they are sturdy and suitable for supporting your weight.
How many places do I require for the dip bar?
Dip bars typically require a clearance of about 3 to 4 feet on all sides to perform exercises comfortably and safely.
Are dip bars suitable for beginners?
Yes, dip bars can be adapted to accommodate beginners by starting with easier variations of exercises and gradually increasing intensity as strength improves.
Can I install dip bars outdoors?
Yes, dip bars can be installed outdoors as long as they are made from weather-prevent ingredients and securely anchored to the ground to and withstand outdoor conditions.
What are some common exercises I can do with dip bars?
Some common exercises include tricep dips, leg raises, push-ups, L-sits, and variations thereof.
Conclusion
In conclusion, learning how to make a dip bar is a rewarding endeavor that can enhance your fitness journey while saving you money and offering creative freedom. By following this comprehensive guide and prioritizing safety and functionality, you can create a durable and effective dip bar that supports your fitness goals for years to come.
As an Amazon Associate, I earn from qualifying purchases.
Leave a Reply